
Refinex is the modern, easier, and quicker way to add search and filter options anywhere within your WordPress website. If you want to enable your users’ search options or filter your website contents by categories or tags of your website, then Refinex is your way to go. It’s an easy way to boost content discoverability and improve user experience without touching code.
Key Features:
- Shortcode-based integration enables you to add search and filtering options anywhere within editable areas.
- Multiple taxonomies filtering helps your users narrow down your content quickly for effective searching.
- With the help of built-in search functionality, you can improve your website’s discoverability and user experience
- Different search component options give you dynamic search embedding options
- A lightweight and easy setup process lets you integrate the plugin and enable its functionality without any hassle.
- Flexible placement allows you to add search and filtering options, whether it is a post, page, widget, or custom post type.
- Live AJAX filtering provides instant search results without any type of page reloads.
- Highly responsive design built to adapt to any type of screen your user may be using.
Try out our incredible Refinex plugin to efficiently add search fields/forms anywhere on your website for completely free.
How to install and activate the Refinex plugin?
The installation process for Refinex is the same as for any other plugin.
Basically, there are three ways that you can install this plugin on your WordPress website.
- Via WordPress Dashboard
- Via Manual Uploading
- Via FTP Dashboard
Via WordPress Dashboard
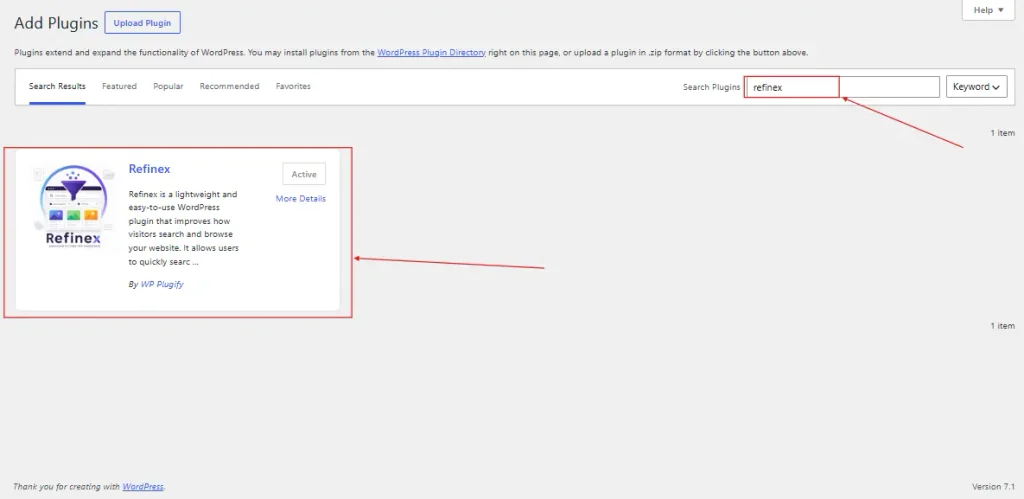
This one’s pretty easy to do.
To install RefineX from the WordPress dashboard
- Go to your WordPress dashboard by logging in
- Then look for Plugins → Add New Plugin.
- Search for “Refinex,” and choose the plugin as shown in the image
- Click on the blue “Install” button to add the plugin to your WordPress.
- Then follow through by clicking the “Activate” button.
Via Manual Uploading
Manual uploading may seem a little tricky. But it’s nothing that a few clicks on the mouse button won’t solve.
To install Refinex (both free and pro versions) manually,
- First of all, access “WordPress.org” or “WPPlugify.com” and download the plugin file that will be stored locally on your hard disk.
- Then, go to your WordPress dashboard, and then click on ‘Plugin’ from the side panel.
- Click on “Add New” and follow through with the “Upload Plugin” button
- Choose the file that you’ve downloaded from the site and install it.
- “Activate” the plugin after the installation is completed.
Via FTP
Among the three, this may be more difficult. Hence, I suggest you back up your site before proceeding.
- As similar to that of the manual method, go to “WordPress.org” or “WPPlugify.com” and download the plugin .zip file that will be stored locally on your hard disk.
- Then extract the downloaded .zip file to a folder and store it on your computer
- Now connect the FTP server using the FTP details and copy the extracted folder to the ‘site-name/wp-content/plugins/’ path
- Now, go to your site’s dashboard and navigate to the Plugins section from the side panel.
- You’ll see the “Refinex” plugin option there; go ahead and activate it.
Accessing the Refinex dashboard
After completing your installation process, it is necessary to know the ins and outs of the Refinex dashboard.
- Log into your WordPress admin, and find Refinex in the left side pane after your plugin activation is completed.
- Then, you will be prompted to the dashboard of the plugin as shown in the image below
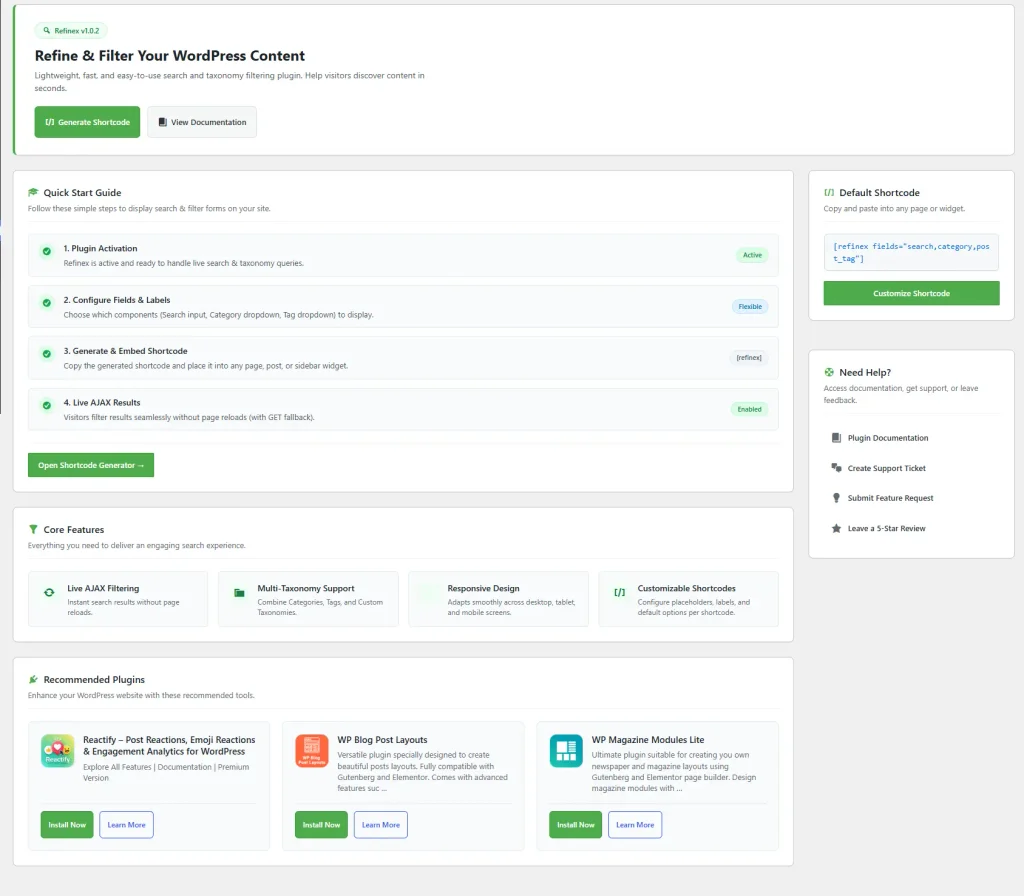
- Click on the Generate Shortcode option at the top to generate your own search filtering option.
Shortcode Configuration in Refinex
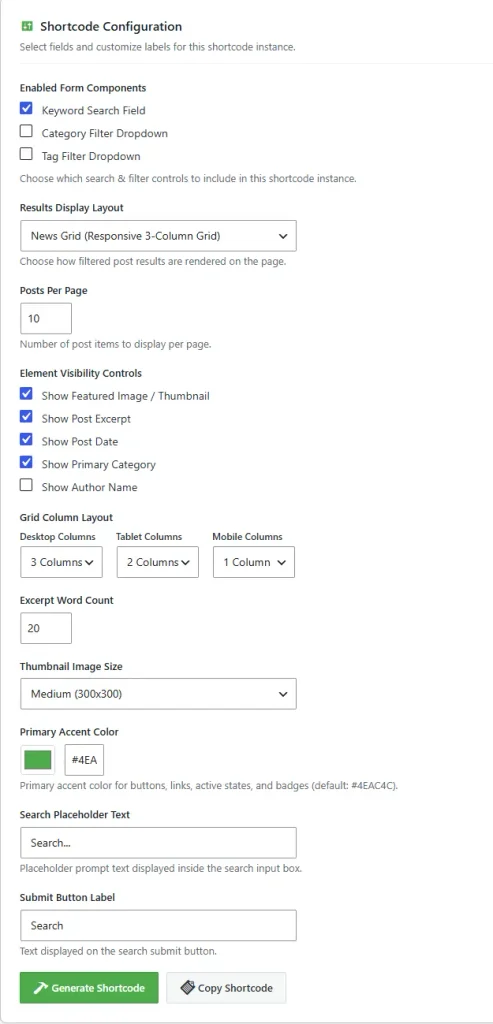
Refinex enables you to customize your shortcode in detailed fashion, including components, display layouts, visibility controls, responsiveness, and much more. You can also design your shortcode with a variety of colors and input text in placeholders as per your choice.
Adding Search Components
- There are various different fields/components that you can add:
- Standard Keyword Search Field
- Category Filter Dropdown
- Tag Filter Dropdown
- Live Instant Search Field (Autocomplete) (pro)
- Author Filter (pro)
- Date Filter (pro)
- The ‘Keyword Search Field‘ lets your user input keywords, and results will be shown relevant to that text
- The ‘Category Filter Dropdown‘ is what the name suggests. People can choose from the available categories on your website and get results of the posts and pages tied to that category.
- The ‘Tag Filter Dropdown‘ also functions the same, where your users will find relevant content based on the tags it has been linked with.
- The Live Instant Search Field (Autocomplete), if enabled, autocompletes the keyword inputted based on the content available on the site. (Available on the premium version only)
- Both the Author Filter and Date Filter allow your user to search the respective field. (Available on the premium version only)
- You can either select one for your personalized page or use all three of them as per your preferences.
| With Refinex Pro, you can have search fields for different taxonomies like Author, Date, Multi select options of your choice |
Field Display Types (Pro)
Refinex Premium enables you to change display types for a particular field in your search form.
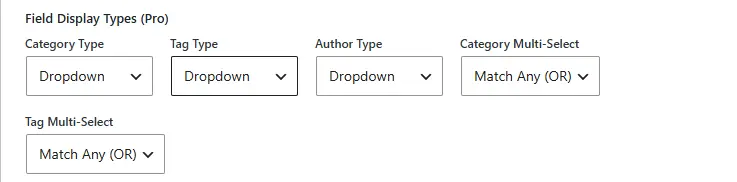
If you have selected fields like Category, Tags, or Author, you select how your users can select each of the fields in the following options.
- Dropdown Menu
- Multi-select
- Checkbox
- Radio option
If you happen to choose the multi-select option for the Tags or Category field, you can also choose your condition: Match Any (OR) or Match All (AND).
| If you don’t know your AND or OR operations, with AND, an item is displayed only if it matches all selected conditions, whereas with OR, an item is displayed if it matches at least one selected condition. For example, if a user filters posts by Trending and Latest, an AND search will show only posts tagged with both Trending and Latest, while an OR search will show posts tagged with Latest, Trending, or both. |
Result Display Layout
You can choose from different layout options for your ‘Search results.’
- Below the search components, click on the drop-down menu in the ‘Result Display Layout‘ option to find your layout options for your result.
- There are three different options to choose from:
- News Grid (Responsive 3-Column Grid)
- Classic List (Thumbnail + Title + Excerpt)
- Compact List (Small Thumbnail + Title + Date)
- You can also choose how many posts you want to display per page below the drop-down option.
Element Visibility Controls
The visibility controls options allow you to add certain elements in your search field, like image thumbnails, dates, authors, and more.
- Look for the ‘Element Visibility Controls‘ option
- There are multiple options where you can ‘tick‘ mark to enable various elements for your search results
- Click on the check box of the relative elements based on your choices or preferences. Here are the options you will find:
- Featured Image/Thumbnail
- Post Excerpt
- Post Date
- Primary Category
- Author Name
Designing your search field
You can design your search field for optimal responsiveness, select your preferred accent color, and adjust the thumbnail image size accordingly.
- The ‘Grid Column Layout’ feature enables you to select the number of columns displayed according to the screen size of your users. By default, it shows 3 columns on desktops, 2 columns on tablet-sized screens, and a single column on mobile devices.
- ‘Excerpt Word Count‘ allocates how many words you want to display on your search results excerpts. You can adjust by adding your own number in the box given.
- ‘Thumbnail Image Size‘ gives you the option to select various dimensions that your thumbnail will render on the results. There are four options:
- Thumbnail Size (150 X 150)
- Medium Size (300 X 300)
- Large Size (1024 X 1024)
- Full Image Size (same size as you uploaded)
- ‘Primary Accent Color‘ is the color for your button, links, active states, and badges. The default is #4EAC4C (light green). But you can choose your own. Click on the palette or input your own HEX code for it.
- Add your own text in the ‘Search Placeholder Text‘ section by inputting the text in the input box below.
- If you have enabled the Category Filter Dropdown or Tag Filter Dropdown option or both, you can also input your custom text for the placeholders for them as well.
- Do the same for the ‘Submit Button Label‘ as well.
Finishing your setup
After you are done with everything, click on the Generate Shortcode option first; you will be prompted to generate a shortcode on the right-hand side of your screen. You can view the form preview for how your search field will appear just below the shortcode.
You can just select the code to copy it (right-click → Copy or Ctrl/Cmd + C) or click on the ‘Copy Shortcode‘ option below the configuration option.
After you have copied the code, go to the post or page that you would like to enable the search form. Add the shortcode block and paste the code (right-click → paste or Ctrl/Cmd + V).
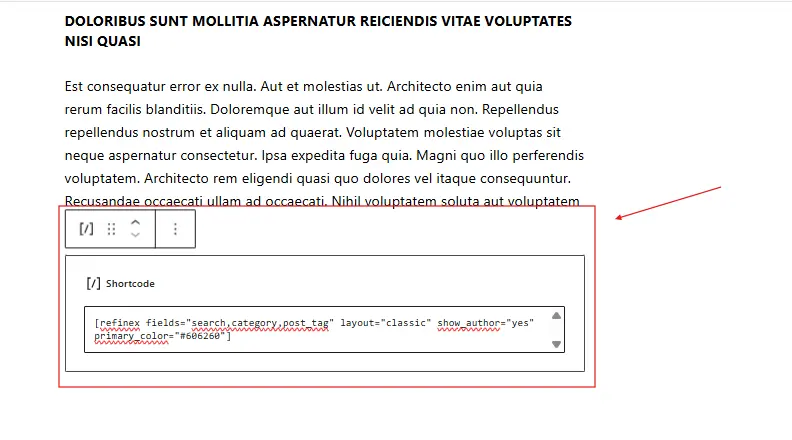
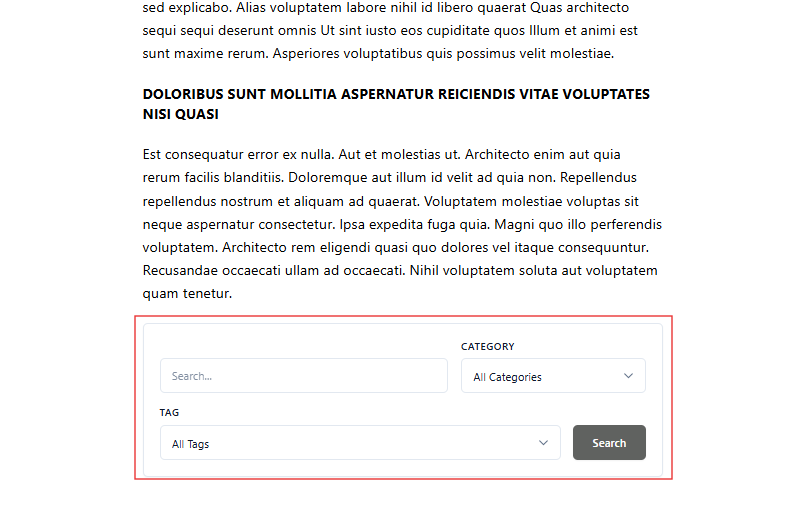
After you’ve made your changes, save your changes. Here’s how your form will appear ↓
Support & Further Help
Need assistance or have pre-sales questions? Visit our Support Center or check out our FAQ page. Our team is here to help you get the most out of Refinex!